So... a short story. Once upon a time we have been asked to make an original Raven Guard Color scheme.
The Phantom Ravens have been born. After a while some one bought the Ravens from the previous owner. And the new one liked the Phantoms so much that he contacted us and ... HEY GUYS !!! I need more of those asap! Make more ravens. And we did.
Here they are!
Today I'll show you Phantom Ravens. These gentlemen have very nice colours, that makes them extraordinary! Now you see another one on level 4th project after yesterday Lizardmen army.
They have a few nice details. For example: a freehand of Raven Guard logo on one shoulder of every marine, and wings of the hero look very nice, don't you think?
Hey Guys! So Robert poped up a really cool lvl 4 Captain Shrike. The man has got some skills! The goal was to make him really similar to the one on the GW page.
Hi guys! I thought I'd show you how to paint raven guard shoulder freehand in a easy way. You can use this method when painting the whole squad/army (as I did ). The important part here is , in the beginning steps, not to paint the whole picture on each marine but to separate each step and paint it onto the whole group before moving to another step. This way you can compare positioning of each part and make all the freehands look similar, if not the same.
Also remember that layers of paint you'll apply have to be thin so it won't disturb the smoothness of the shoulder pad.
step 1. First you have to imagine the raven on the shoulder pad and think how to position it. It's important to leave some space above and beneath the logo. The picture shows gray imaginary arch which sets the top edge of the wings. Using black paint make four symetrical dots determining the angle, lenght and edges of the top of the wings line. Paint vertical line through the middle of the shoulderpad, ending where the tail's tip should be and mark the level of bird's waist. Paint the arch between two highest dots.
step 2. Connect the lines and paint the bottom arch marking the line where wing feathers start to separate and fillitwith black.
step 3. Add the shape of bird's trapezoid 'torso'. Paint leg lines a little thicker so you can cut the final shape out of it later, legs should go as the step 3 gray shape but lower. Add the shape of tail and fill it with paint as well as torso.
step 4. Paint two separate lines on each side of bird, one on inside longer and parallel to leg lines, third line going a little up.
step 5. Paint feather lines starting from the outer side. The middle line of each wing here starts from the end point of longer line from step 4. Keep the lines somehow parralel to each other leaving even spaces in between.
step 6. Add the head. Now we get a bit closer to the final look.
step 7. Add the nib. If the line gets too thick, you can fix that later. Now time for white paint. The orange shape shows how and where your should cover the freehand with white. Paint straight white lines making the feathers tips even and cut the raven with one line connecting tail and outer feather of wings.
step 8. More white corrections- shaping the legs, tail and head.
step 9. Add an eye and here we have the final form - looks nice, clean and graphic. Add some more black if cutting with white went too far :P
I hope you'll find it helpful :) In this tutorial I wanted to show how I separate each steps but if you feel like it, you can mix the sequence of steps a little - for example split the process into more easy steps like outline of shapes first and filling it with color later.
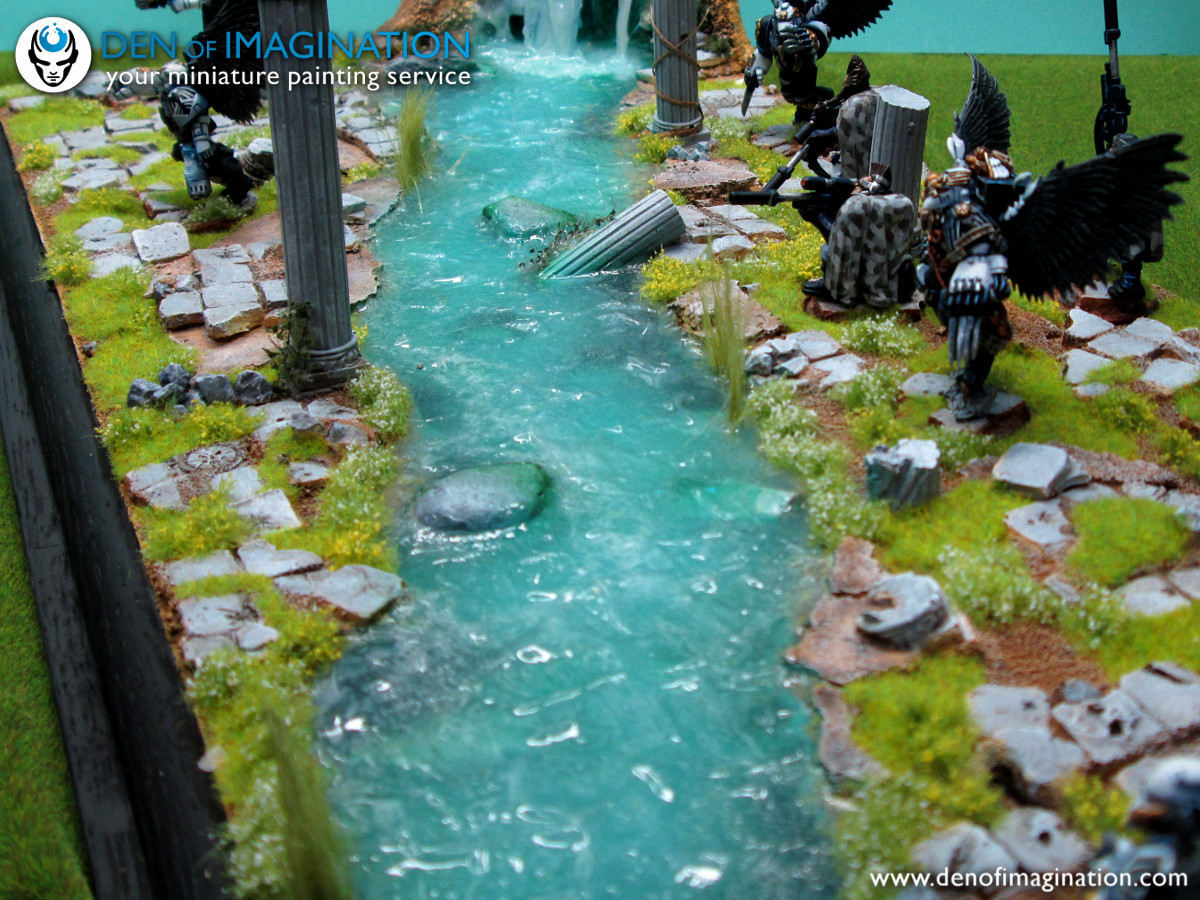
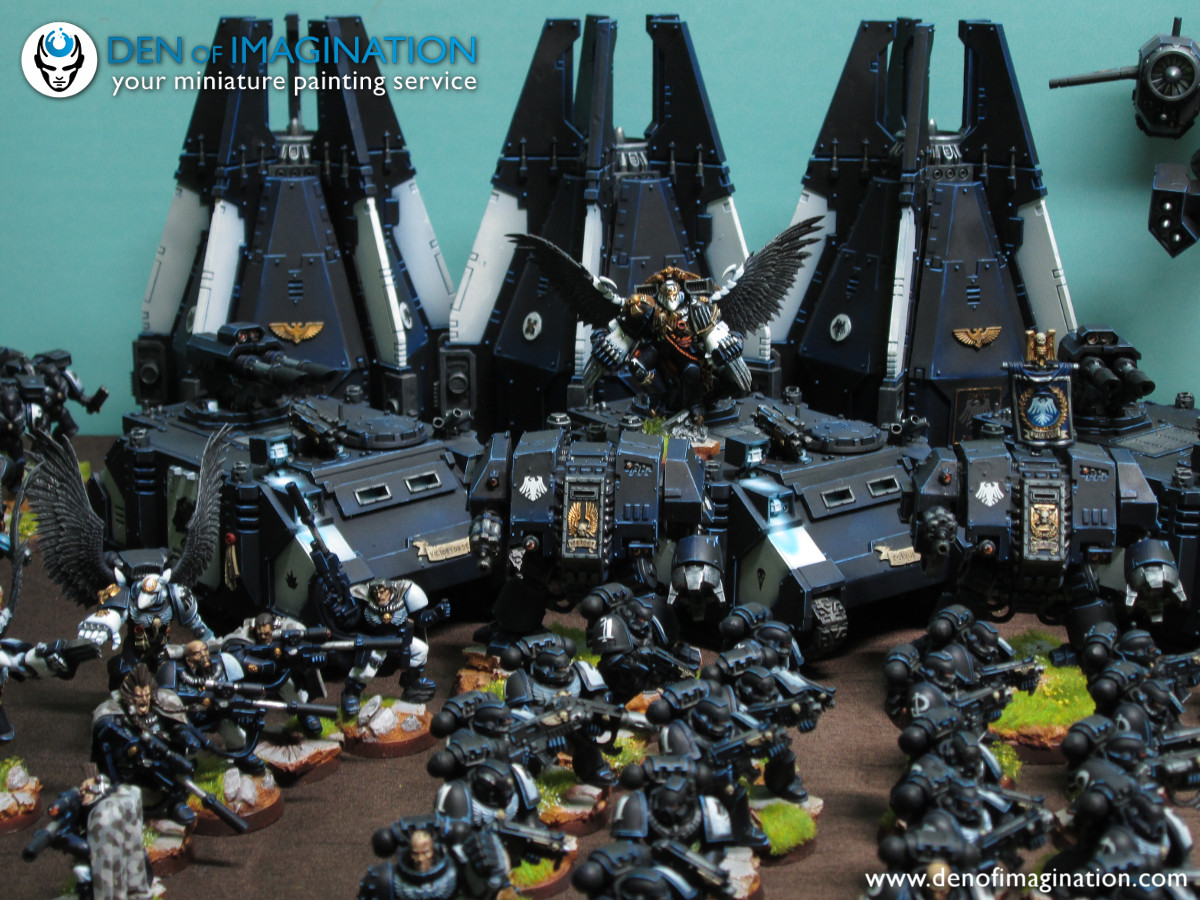
When I first seen this I when crazy. I love stuff like this really much. The atmosphere that the whole scenery creates is just soo cool. Raven guard Kill team covering ground preparing for the finial assault. Just breathtaking. I really have to give my congratulations for Natalia Paulina and Michael that worked on this diorama. You did awesome guys!
The title sounds like a name of some rock band ^^ I would buy there album if they ever made one. Really like the conversion part here those scourges wings make those vanguards look super awesome. We can't overloook the cool camo work on scouts. Very nice work. Tomorrow we will show you the diorama for this kill team. Stay tuned.


.jpg)
.jpg)
.jpg)


.jpg)
.jpg)
.jpg)
.jpg)