Painting Service

Den of Imagination offers a variety of services including single display miniature pieces as well as an army painting service.

Blood Angels

GIGANTIC BLOOD ANGELS ARMY WITH EPIC FREEHANDS!

Hierophant showcase!

From our painting service - our level 6 (Legendary) Bio Titan! Paulina did wonderful job...

THE TEMPLE

Now this is something special fresh and new. Fist your eye on The Walking Temple.

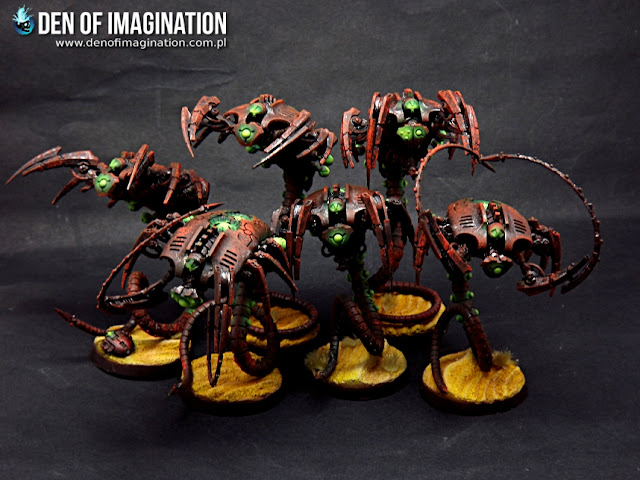
RED GLOW NECRONS

Make it glow. oh yeah take a look at this eye candy.

Monday, April 29, 2013

How to sculpt Nurgle Face Tutorial

     Hey guys! According to public demand I prepared a tutorial for making Chaos Space Marine Nurgle Daemon Faces ^^. Oki let's begin.

     For this sculpting piece I used:
-Clay Shapers
-Sculpting Knifes
-Green Stuff
-Super Glue
-Hand Creme


Step 1. To save time I used a Chaos Space Marine head for the base of my green stuff conversion. I chose the raptors horned head because it had horns already so one part was already done for the Nurgle part.

Step 2. I cut off one horn, the whole face and the chin. That is made so the head won't be too big after adding greenstuff.
Step 3. I prepared some greenstuff. Not too much. With a tiny drop of super glue I attached the putty to the scraped part of the head.

Step 4. With a clay shaper and some cream I shaped the rough shape of the head. For Daemon of Nurgle the upper section is smaller the in human heads because they have one eye. I made the temple section nice and flat. The front part should be a bit convex.

Step 5. With the sculpting knife and again some cream I started sculpting the eye. With a crescent move from the bottom the eyelid was made.

Step 6. Using the same technique I did the eye and the under eyelid. The first line was made inside the upper lid and the second one outside of it.
Step 7. I pushed the clay upward to form cheeks and line the jaw.

Step 8. Now I begin to make the teeth. With the sculpting knife I have cut the mouth four times lining the mouth and making three teeth. For now the upper teeth and the bottom ones were fused together.
Step 9. With the knife I separated the upper and lower teeth by pushing the clay inside shaping the upper teeth. I also pushed the sides of the mouth a bit inside. At this point I also started working on the lower jaw.

Step 10. Still with the sculpting knife I gave shape to the lower teeth and pushed the clay a bit away from the teeth to form lips.

Step 11. It ain't Nurgle without some rotting skin. At the hornless side I made some lesions and exposed skull bone. For more details on rotting skin checkout my older tutorial on that.

Step 12. Cosmetics. With two delicate crescent cuts I formed the wrinkles above the eye to give some detail to the forehead. Also I pushed the cheeks a bit down with a ball end of the sculpting knife. 

     The finished result looks like this. If you want to see some more Nurgle faces, check out this link. Sculpting nurgle parts is quite enjoyable and very forgiving. I really recommend it if you are interested in starting to sculpt something of your own.


     If you enjoyed this tutorial please share it with your friends and check out the studio's Facebook page.

Feed your Imagination,
Brovatar.

Saturday, April 27, 2013

We Rot!

    Update on the Nurgle Chosen CSM. Building those guys gives me so much joy. The guy on the fist picture is the only one who is finished all the rest is wip. I'm so happy that I chose the raptor parts for base. The dynamic poses that I can achieve with those guys is sooooooo cool.

     Some of you asked about sculpting so there is a tutorial scheduled for Monday on the Den. So be sure to visit the site then.


Feed your Imagination,
Brovatar.

Wednesday, April 24, 2013

Nurgle I choose you!

      When the boys are deep in Necron Boxes at the studio I'm working on some Chosen of Nurgle Chaos Space Marines. The whole project will consist of 16 Chosen, one Plasma Squad and one Flamer Squad. It's going to be a nice conversion fest.

     I chose the new raptor bodies to make those conversions because their chaos armor is in the same style as the chosen from Dark Vengeance. Lot of Cool Nurgle Detail on those guys how do you like the project so far?


Feed your Imagination,
Brovatar.

Tuesday, April 23, 2013

Bowling team

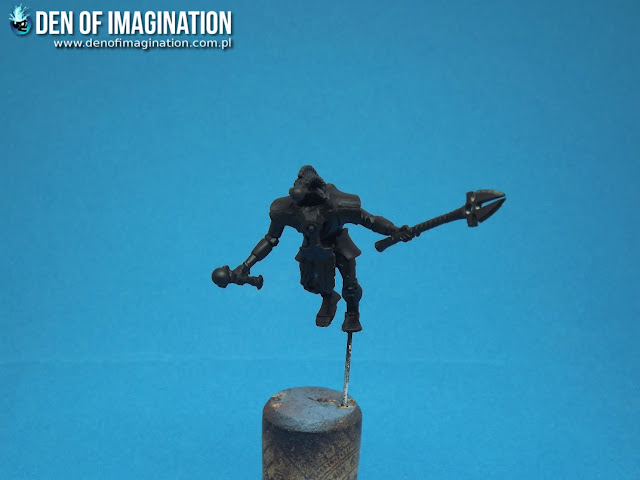
     Just wow. We are really starting to be Necron experts around Den of Imagination Studio. I'm telling you. Four big Necron Projects and a bunch of smaller ones? Are you kidding me? Oki New Necrons have started and they already have a bowling team and a Cryptek. I don't really like the resurrection orb in hand look. Too much to make four guys the same way so I did the same thing I did last year. Shoulder Orbs ^^ Yeah Baby! Those two have both their hands to wing heads of now. You like?


If you like our articles don't miss our Facebook page, exclusive content awaits!

Feed your Imagination,
Brovatar.

Sunday, April 21, 2013

Painting Tau Sun Shark Tutorial part-2

    Time for the second part of the Tau Sun Shark Tutorial. Today we will be discussing the detail finish after the painted camouflage. Boys let's get to it.

      After we have the camo done its time for details. I started this by painting the exhausts, pipes, rockets, guns etc. with Abaddon Black.

    When all that needed to be black was painted, it was time for some balance in the world. So I added some white. The parts painted with white were the drone holders on the wings.

     At this step it was time to do some contouring and lining. I washed all the grooves with Agrax Earth Shade. Also by using Russ Grey I lined all the black parts.

     I finished the model with lining the bright parts with Ushabi Bone and the black parts Space Wolves Grey. After that I painted the lenses red and the model was done.


      I hope you enjoyed this tutorial. If you liked this one, be sure to join our Facebook and get notified about our new articles.

     You can buy this model on ebay.

Feed your Imagination,
Brovatar.

Saturday, April 20, 2013

Canoptec Coils

     First unit of Canoptec Wraiths. The detail on there backs is cool. I like how they have turned out the rust theme suits them well.


Feed your Imagination,
Brovatar.

Gettin bigger!

     Hello to all Den of Imagination fans. My name is Michal aka Bania. You may ask why this fat loser is introducing himself here and the answer is as simple as you can get it. After 1 year of constant rivalry, fights and backstabbing - "Minion Studio" which I was co-creator has been finally destroyed and now I am a servant here.

Alright, that's not what happens. The truth is I am a cheap sellout with no moral spine and I left my employees, ideas, dreams and hopes for personal gain and money!

Alright, alright... at least for now no more jokes...

      Den of Imagination and Minion Studio were two separate projects running by friends in the same city. Both projects started in around 2008. We've began to take small commissions as a side work. These were small orders mostly for our friends and colleagues. Over the years the commissions kept coming from all over the world and we've decided to open a professional Painting Studios. We are still growing, we are all friends and we decided there is no reason to do it separately anymore. We are merging together.

It seems it is "the biggest fusion in the history of European painting studios or at least in our home city"...- if you can't imagine what happened, here is something that might help you:

      So from now on we will all work under the "Den of Imagination" banner. What does it mean for our old and new clients? Bigger, better, faster :) We are moving to new studio location, preparing Youtube videos, employing new painters and sculptors. We have new challenges ahead of us, for example moving content from one website to another will take some time but in the end everyone will benefit. The idea for all those moves came from wikipedia blog username Heraclitus, he/she wrote: "The Only Thing That Is Constant Is Change".

     One thing left to do - CELEBRATE!!!

I'll be back,
Bania

Friday, April 19, 2013

Painting Tau Sun Shark Tutorial part-1

    Yesterday I have showed you the Sun Shark Bomber. Today I would like to show you how I went about painting this little aircraft.

     The first step was to paint the model with Skull white primer.
I followed that with a flat coat of the old Citadel range Tausept Ochre, airbrushed all over the model.
    The second step was to prepare the stencils. I took a sheet of plasticard and cut irregular shapes to do the camo. The plasticard was 1 mm thick. The thiner plasticard you have the better, because you will need to place it flat on curved surfaces of the plane.

     I took out the airbrush and off we went.

      The first set of shapes was made with Vallejo air range Orange. At this step I tried to cover more then 40% of the planes surface.


      The second set of shapes was painted on using Vallejo Air Sand Yellow. At this step the important thing is too cut the yellow surface as much as possible so that it will appear more like shapes and not like the planes actual colour.


     If you like this tutorial and don't want to miss the next part follow Den of Imagination on Facebook, it's free ^^.

Feed your Imagination,
Brovatar.

Ogres!

Who doesn't love those big ugly faces. Ogre Kingdoms commission is almost finished. If you haven't seen hero pics on Minion's website we're gonna upload them here soon. For now take a look on those guys:


And for good weekend start my new favourite short joke:
There are 2 fish in a tank, and one says: How do you drive this thing?

Bania.
P.s. You can't hurt me, I know I am ugly and not funny at all.